Monday, January 21, 2013

Jan 15-18

This week, I learned more about the difference between mixtures, compounds, and elements.

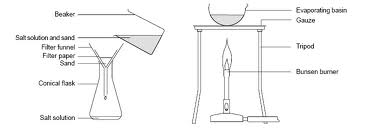
Essentially, this reminded me of when I had to learn this in 6th grade. I had a vague idea of what each were and their differences. So, I went with my hunch and guessed that mixtures were like putting Snickers in a shake. Even though you physically combine both, you don't change any of their properties. The Snickers are still Snickers, and the shake is still a shake. Now, compounds are a different story. If I remember correctly from 6th grade, compounds were when two or more elements were chemically combined and their properties changed chemically. Elements were their own separate entities that contained their own properties.

Over this week, we went over problems involving this topic. We looked at pictures on the Google Drive. One of the pictures looked like two blacks combined together. At a first glance, it seemed to me like an element, but as I looked closer, I realized that it may be different from the elements that were combined to make this arrangement. So, this question came up in class: Is it an element, or is it a compound? This then reminded me of O for Oxygen and O2, and H for Hydrogen and H2. One rationale was that since two of the same elements combined, then they would be still an element. Another argument was that they combined to form a different compound. So, what is it? One or the other? Or, is it something? However, we did come to a consensus that this was a diatomic substance. But, I then realized that this was a molecule. Therefore, I came to the conclusion that diatomic elements are molecules, that elements of the same kind can combine to make molecules, and that neither seemed to change chemical properties. I think, therefore, that since they both had the same properties, they combined without changing their properties.

Next, I looked at two pictures. One showed one element combined to a different element and then another one with a different element but not combined. The top picture shows two elements in a substance not chemically bonded. Therefore, this is a mixture because the elements have still retained their properties, and as a result, they haven't changed. On the other hand, the bottom picture showed two different elements chemically combined together. Therefore, this is a compound because their properties have changed as they have formed a new substance.

In class, here was another challenge. Let's just say that there were 2 pairs of H2O and each pair represent 100 mL, so there are 200 mL of H2O overall. The question was this: What percentage of volume does each take up? This means don't look up the atomic mass of hydrogen and oxygen. So, what I did was this. I considered the H2O molecule overall. The water molecule consists of 2 Hydrogens and 1 Oxygen. Therefore, I considered a 2 to 1 ratio. So, overall, H2 is 2/3 of water molecule and the oxygen was 1/3. But, we are only considering half of the overall volume. This is fine, though, at least this demonstrates an overall understanding of how much space each element takes up in a molecule. Even though there were 2 H2O molecules, the percentage of Hydrogen is still 2/3 (67%) and the percentage of Oxygen is still 1/3 (33%). Also, one way of considering this is drawing H2O and H2O in a box, then separating the H's and the O's. What you get is two H2 pairs and 1 O2 pair. If you did this correctly, you should get a 2 to 1 ratio. You should get 4 H's and 2 O's. The total is 6 elements. Therefore, the fraction of H's is 2/3 of the volume, and the fraction of the O's is 1/3.

So, what are their volumes overall? Since Hydrogen consisted of 2/3 of 200 mL, there are 134 mL of Hydrogen, and since Oxygen consisted of 1/3 of 200 mL, there are 66 mL of Oxygen. Therefore, no matter how many molecules you consider, the ratio must remain the same in order to correctly calculate its overall percentage.

Next, there was this problem: hypothetically, there are H2 in a container of 50 mL and O2 in a container of 50 mL. What would be the volume of the two if they were to combine? Suddenly, I had this hunch that this was H2O2 (hydrogen peroxide). I remembered that this was mentioned in 6th grade, so I considered that if they combined, then they would form a new substance. But, how would that affect the volume? Well, I thought that since they chemically formed a new compound, the volume would be 50 mL based on the overall average of the volumes. So, this makes me think of the possibility of the volumes of two different elements together combining and then averaging out to equate to a new volume in case the volumes were either the same or different.

Monday, January 14, 2013

Jan. 8-11

This week, I learned about examining the physical and chemical properties of various during class.

In class, my group and I were doing a group experiment. The challenge was to separate these substances understanding their individual properties. The substances we had to separate were sand, salt, bird seeds, and iron filings.

So, what we did was we used our background information on iron. What do we know about iron? Well, this reminded me of the one time when I had to bring in cereal with traces iron in it, smash it into tiny bits, pour into a cup, and then use a magnet on the side of the cup to attract the iron. So, I then had an aha moment. I realized that iron had magnetic properties, so we could use a magnet to get them out.

But, how is iron magnetic? Well, we learned in our 5th grade science class that there were two opposite poles that would attract or repel substances. But, that doesn't explain how or why iron is magnetic. I speculate that it has to do with the magnet's chemical and physical properties. Iron may have electrons arranged in a way that will allow it to attract to the magnet. I think it is possible that iron, other magnetic substances, and the magnet itself have similar chemical configurations, which is why they attract to the magnet.


Next, I considered filtering bird seeds since one bird seed is larger than that of a grain of sand or salt. First, though, I needed to know how I was going to separate, but I had to find the why part first since it seemed important to understand more of its properties. I then started thinking about density. I wondered if the density of a bird seed was more or less than that of water. So, I then poured water into a beaker and then put a bird seed in it. It floated. But why? I then started connecting it to its density. The density of bird seed was less than that of water, which is 1 g/mL. Next, I considered possible ways to get the bird seeds out. Since iron is out of the equation, I could pour the rest of the solution into the beaker of water. I figured that since salt and sand stay at the bottom of the sea floor of the ocean or any body of water for that matter, they would sink at the bottom because they have a higher density while the birdseeds would stay afloat. Or, I could use a funnel and fold a coffee filter into it and gradually pour it with water and scoop out the bird seeds until they are completely gone.

However, the main question left is this: How would you separate the sand and the salt when their granule size is so similar? Well, the salt granules are probably smaller than that of the sand.  The salt's chemical composition is sodium chloride, while the sand consists of a mixture of minerals. To filter them out, though, it seems the only plausible method is to filter out the sand since its granules seem to be slightly larger. If we found a screener with small enough space to let salt stay in and large enough to get the sand out, then the salt would still be on the screener while the sand would be pored somewhere else through the screen's spaces and then evaporate the water to possibly separate them.

Or, consider this. Salt is more soluble than sand. Sand is denser than water but isn't soluble. It is possible that by pouring both into water and stirring the solution to get the salt to dissolve that the sand would eventually sink back to the bottom. So, one way of getting the salt out is to scoop out the water with the salt without the sand.

This week, I learned about physical and chemical properties, elements, compounds, and mixtures. First off, physical properties are merely the physical descriptions of an element (e.g. density, solubility, color,   melting and boiling points, etc.), while the chemical properties are their chemical descriptions (e.g. flammability, reaction rate, etc.). To review, density is the certain amount of mass (g) in a certain amount of space (mL). It will determine whether a substance will float in any liquid substance. For example, iron will not float into water because it has a greater density, whereas, oil will float on top of water because its density is less than that of water. Next, solubility is the ability to dissolve in any liquid substance. We looked at ethanol and water in class and poured sugar into each. I hypothesized that since ethanol had more viscosity (resistance to flow), it would be harder to dissolve sugar in it. As sugar was poured into both, it took a longer time for sugar to dissolve in ethanol.


I then learned that elements are single pure substances, mixtures were compounds physically mixed together. Compounds were elements chemically mixed together. Take a look at iron and sulfur, for example. If you were to smash the two substances and then physically mix them together, they would just be a mixture of iron and sulfur. Knowing that iron is magnetic and the two substances aren't chemically bonded together, you could separate the iron from the sulfur using a magnet. However, if you put them in a test tube with water and them heat the test tube, they will make iron sulfide. Since these two are chemically bonded, there is no way you could get the iron out using a magnet because the chemical structure is different than the magnet's chemical structure.

Sunday, January 6, 2013

Dec. 19-21


Brise de Mer company logo
This week, I learned how to make soap. It was a fun educational experience where we could make our own soap in a hypothetical situation where we own our own company and had a logo.

During the soap making experiment, I learned that the most effective way to work is to split up the work evenly so that everyone can contribute without one person doing everything. For example, two members took pictures of the soap-making steps and the soap. Next, I assigned one other group member to get the supplies and choose the ingredients to use and to make our company logo, which is Brise de Mer. Lastly, I decided to collaborate all the photos and the research on soap into Evernote to make a Soap Project Notebook and share it with the class.

To make the soap, we decided to use, for essential oils, olive oil, and for colors, pink, some white, purple, and orange. We decided that we would use holiday wrapping and packaging and molds.
These are the steps used to make the soap:

•         Materials needed are glycerin, knife, beaker, hot plate, thermometer, essential oils, coloring, fragrances, rubbing alcohol, soap molds, gift wrapping materials.

Packaging, glycerin, essential oils, colorings, and molds.
•         Chop glycerin into 4-8 blocks.

•         Then put the glycerin blocks in the beaker.

•         Then, put the beaker on a hot plate. Adjust at medium heat (5-6). Change adjustments accordingly, but avoid boiling if you can. In order to determine if it boils, notice the condensation on the glass. If the glass appears cloudy, then the soap solution is over boiling. If it does boil, turn down the heat for about a minute and then gradually increase from 0-5.

•         Next, watch glycerin melt. As it turns from a solid to a liquid, add essential oils, colors, and fragrances.

How soap bars came out in the end.
•         Then, stir the solution with a spoon or straw.

•         When the temperature of the solution is around 54 degrees Celsius, pour solution into soap molds.

•         Once you pour the solution into soap molds, bubbles will appear. To avoid excess bubbles and to keep the soap layers sticking together, spritz a bit of rubbing alcohol.

•         Then, let the soap solutions in the molds cool for 24 hours so that they solidify. Then, the next day, each solution should look like a typical bar of soap one uses in the bathroom ready to wrap!

•         Lastly, package them.

The soap changed different states. When melting the glycerin, it changed from a solid to a liquid around  54ÂșC. Then, once the soap solution, after adding colors, essential oils, and fragrances, is poured into the soap molds, the soap solution changes from liquid to solid as it cools over 24 hours. The particles became more and more structured and crystalline as the temperature dropped, causing the particles to move slower.


In the melt and pour method, what occurs is glycerin is melted on a heat melter or large double boiler. Then, fragrance, essential oils, moisturizing agents, dyes, or exfoliating agents are added. While hot, the soap can be poured into molds where cooling will occur.
Particle motion of soap during melt
and pour method.

When making soaps, it is important to consider what fats are added in the soap. This is important because fats have different crystalline structures and chemical bonds. So, chemical bonds can occur at different rates at different temperatures and at different rates. For example, if a fat with a very crystalline structure is used to make soap, it will be difficult making soap at low-moderate temperatures because it will require a higher temperature to melt this in order to change its state of matter, or a longer period of time for energy configuration to increase to make the particles move farther apart. Different fats, thus, affect the outcome of the soap.


Thus, the soap with the crystalline-structured fat has the highest density yet the lowest energy configuration since the particles are closest together and move the slowest, and the soap with the less crystalline-structured fat has the least density yet the highest energy configuration since the particles are farther apart and move faster.

Lastly, temperature is an important factor in the melt and pour process. The higher the temperature of the soap is, the more gel-like your soap will become since chemical bonds and attractions between particles are being broken and there is enough energy in the phase account to make the soap change state. But, if the temperature is lower, then the chemical bonds and attractions between particles won't be broken as much, and there may not be enough energy in the thermal or phase energy accounts to make the soap change state.